
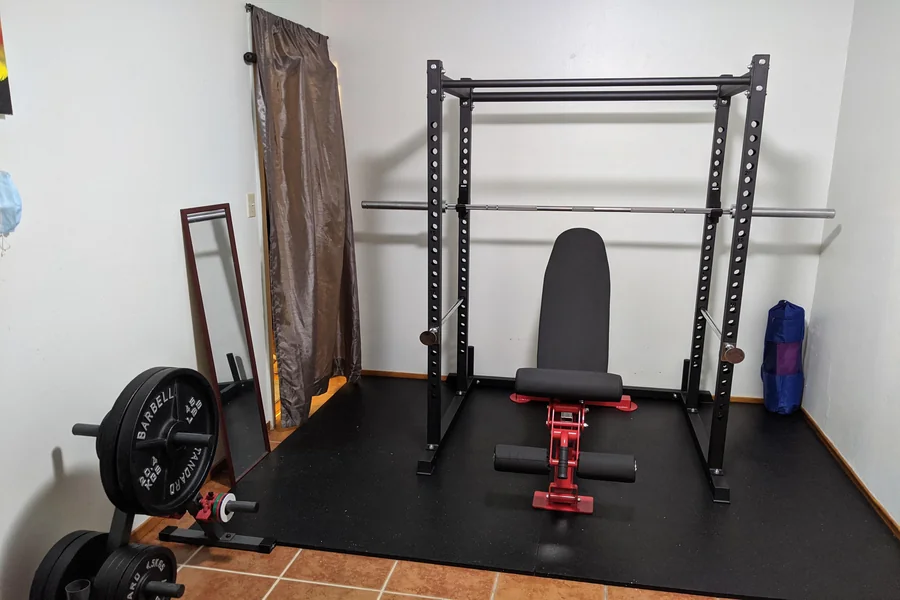
You don’t need a spare room or a three-car garage to build a home gym that actually works. Plenty of people are squatting, pressing, and pulling in 80 square feet of basement space, a converted bedroom corner, or a one-car garage that still fits the car.
The secret isn’t buying less equipment — it’s buying smarter equipment and planning your space before you spend a dollar.
This guide walks you through exactly how to do that, from measuring your space to choosing gear that earns its square footage.
Step 1: Figure Out How Much Space You Actually Have
Before you start shopping, grab a tape measure and spend 10 minutes with your space. Most people skip this step and regret it.
Here’s what to measure:
- Floor footprint — the open area where you’ll actually train (not including shelves, water heaters, or that corner full of storage boxes you’ll “deal with later”)
- Ceiling height — critical if you plan to do any overhead pressing or pull-ups. You need at least 8 feet, ideally 9+
- Door clearance — you’ll need to get equipment in. Most power racks and Smith machines ship in multiple boxes, but it’s worth checking
Minimum space requirements for common setups:
| Setup | Minimum Floor Space |
| Dumbbells + bench only | 30–40 sq ft |
| Power rack or Smith machine | 50–70 sq ft |
| All-in-one rack with cable system | 60–80 sq ft |
| Full garage gym with open floor | 150–200 sq ft |
If you’ve got 60–100 square feet, you can build a surprisingly complete training setup. You just need to be deliberate about it.
Step 2: Map Out Your Layout Before Buying Anything
This sounds obvious. Almost nobody does it.
Take a piece of graph paper or use a free floor plan app on your phone. Draw out your space to scale, then sketch where each piece of equipment would go. Don’t forget to account for:
- Walking paths — you need to be able to move around the equipment safely
- Bar path clearance — if you’re squatting or bench pressing, the barbell extends well beyond the rack itself
- Cable movement zones — cable machines need open space in front of and behind the attachment point
A practical trick: use painter’s tape on the floor to mark the footprint of equipment before you buy it. The actual dimensions of a rack always feel smaller on paper than in person.
Space-saving layout principles:
- Put your largest piece of equipment in a corner or against a wall to free up the center
- Use vertical space — wall-mounted storage for barbells, bands, and small accessories
- Keep high-use items accessible; store seasonal or rarely-used gear elsewhere
Step 3: Choose Equipment That Earns Its Footprint
In a small space, every piece of gear has to justify its square footage. That means prioritizing equipment that does multiple things well over single-purpose machines.
The Core of Any Small Home Gym: An All-in-One Rack
If there’s one piece of equipment worth spending money on in a small space, it’s a multi-functional rack. The best ones combine a power rack, Smith machine, cable pulley system, and pull-up bar in a single footprint — often under 50 square feet.
This matters because instead of buying four separate pieces of equipment (and finding space for all of them), you’re getting the function of a full gym in roughly the space of a large refrigerator.
An all-in-one home gym machine like the Major Fitness B52 is a good example of what this looks like in practice: it combines a power rack, Smith machine, cable pulley system, multi-grip pull-up bar, and landmine attachment in a single unit. For a small home gym, that kind of versatility in a compact footprint is hard to beat.
For spaces where floor area is at a premium, a folding power rack is worth considering. Models like the Major Fitness F35 fold flat against the wall when not in use, reclaiming floor space for other uses — which matters a lot if your “gym” doubles as a garage, guest room, or laundry area.
Adjustable Dumbbells vs. A Full Dumbbell Set
A full set of fixed dumbbells runs from 5 lbs to 50 lbs and takes up an entire rack’s worth of floor space. Adjustable dumbbells — the kind where you dial or click to change the weight — give you the same range in a footprint about the size of two shoeboxes.
If you’re working with limited space, adjustable dumbbells are an easy call.
An Adjustable Bench
A flat bench is fine, but an adjustable bench that goes from flat to incline to decline gives you significantly more exercise variety without taking up more floor space. Look for one with a small footprint and the option to store it upright against a wall.
What to Skip in a Small Space
- Dedicated cardio machines (treadmills and bikes are large, single-purpose, and rarely used after the first few months)
- Multiple barbells (one good Olympic barbell covers everything)
- Separate cable stations if your rack already has integrated cables
Step 4: Protect Your Floor and Walls
Rubber flooring isn’t optional — it’s functional. Dropping weights on bare concrete or hardwood damages both the floor and the equipment over time. More importantly, rubber mats reduce vibration and noise, which matters if you’re training in an apartment, attached garage, or anywhere near a living space.
Floor coverage tips:
- Cover the full footprint of your rack plus 2 feet on each side
- 3/4-inch horse stall mats from farm supply stores are cheap, durable, and widely available
- Interlocking rubber tiles work well for odd-shaped spaces
For walls, if your rack is close to drywall, consider adding a sheet of plywood behind it. It gives you a solid surface to bolt in wall storage and protects against accidental bar contact.
Step 5: Use Vertical Storage to Reclaim Floor Space
Most people use the floor. Smart small-gym owners use the walls.
Vertical storage options worth considering:
- Wall-mounted plate storage — keeps weight plates off the floor and organized
- Horizontal barbell holders — store your barbell at shoulder height rather than on the floor
- Pegboard or slat wall — flexible storage for resistance bands, straps, chalk, and accessories
- Hooks for jump ropes, foam rollers, and smaller items — these pile up fast and eat floor space if you let them
A few hours and $100–200 in wall storage can make a cramped gym feel significantly more organized and usable.
Step 6: Light It Properly
This sounds minor until you’re training in a dimly lit garage and you can’t tell if your squat depth is on point. Good lighting makes your gym feel more like a gym and less like a storage unit you occasionally work out in.
LED shop lights are inexpensive and easy to install. Two 4-foot LED fixtures will adequately cover most small gym spaces and cost under $60 total.
A mirror is also worth the investment if your space allows for it. Beyond the aesthetic, being able to see your form while lifting is genuinely useful for training safely on your own.
A Realistic Small Home Gym Setup by Budget
Under $1,000 — Minimal but Functional
- Adjustable dumbbells (up to 50 lbs)
- Adjustable bench
- Resistance bands
- Rubber flooring
This covers a solid range of bodyweight and dumbbell training. Limited for heavy compound lifts, but a legitimate starting point.
$1,500–$2,500 — The Sweet Spot for Most People
- All-in-one rack or power rack with cable attachments
- Olympic barbell + weight plates
- Adjustable bench
- Rubber flooring
At this budget, you can build a genuinely complete strength training setup in 60–80 square feet. You’ll be able to squat, bench, deadlift, do pull-ups, and run cable exercises without leaving your home.
$3,000+ — A Serious Home Gym
Everything above, plus:
- Upgraded attachments (leg extension, dip bars, landmine)
- Additional weight plates for heavier work
- Full rubber flooring coverage
- Wall storage and organization
Common Mistakes to Avoid
- Buying equipment before measuring. Always measure first. A rack that fits in a showroom may not fit through your door or leave you enough room to actually use it.
- Underestimating ceiling height. If you want to do overhead press or pull-ups, measure your ceiling. A standard 7-foot basement ceiling may not give you enough clearance.
- Buying too much too soon. It’s tempting to buy everything at once, but start with the anchor piece (your rack or all-in-one system) and add from there. You’ll learn quickly what you actually use.
- Choosing a heavy rack on an upper floor. A loaded barbell rack can weigh 500+ lbs. Make sure your floor can handle it, especially on elevated levels. When in doubt, consult a contractor.
- Forgetting about ventilation. Garages in particular can get extremely hot or cold. A fan and a space heater aren’t glamorous, but they make the difference between training consistently and avoiding the gym for three months.
Final Thoughts
A small home gym isn’t a compromise — it’s often a better training environment than a commercial gym. No waiting for equipment, no commute, no distractions. Just show up and train.
The key is treating the space thoughtfully. Measure before you buy, prioritize multi-function equipment that earns its footprint, and use vertical storage to keep the floor clear. Get those three things right, and you can build a training setup that rivals gyms twice the size.
Start with the anchor — a solid all-in-one Smith Machine or Power Rack from Major Fitness — and build from there. Most people are surprised how little space they actually need to train seriously.

Passionate about exploring diverse ideas and sharing inspiration, I curate content that sparks curiosity and encourages personal growth. Join me at ElementalNest.com for insights across a wide range of topics.