
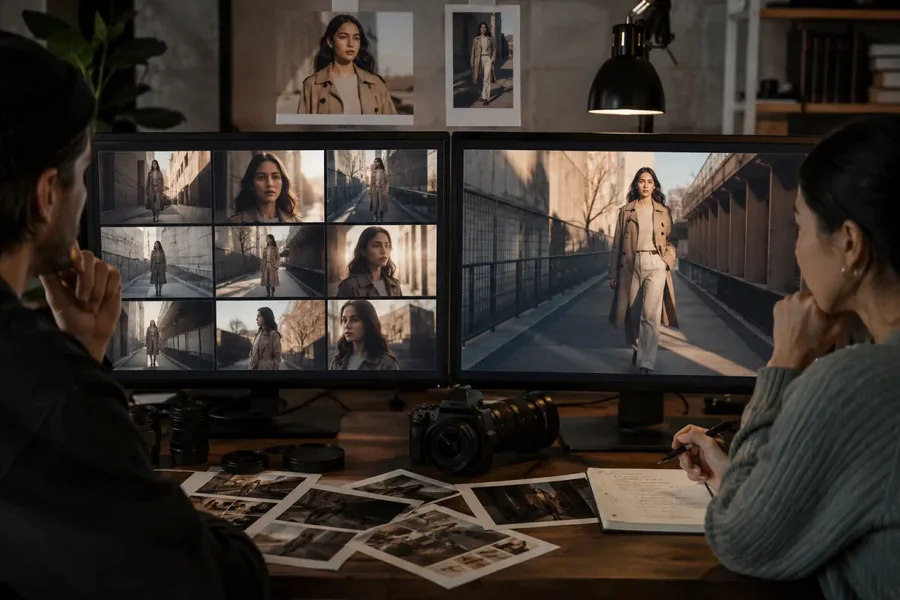
An off-center picture is not simply a centered picture with the subject nudged sideways. The empty area has a job: it may hold a headline, reveal a room, suggest that someone has just entered the frame, or make a phone photograph feel less staged. If the prompt only asks for a “candid” or “imperfect” image, the generator can still return a polished portrait with the face planted in the middle.
That recurring result is best treated as a composition problem, not proof of a universal model defect. The ClipDance image route commonly called Grok Imagine 2.0 uses xAI’s Imagine Image 2.0. It can interpret a prompt and reference images, but it still needs a visible definition of where the subject belongs and what the vacant part of the frame should contain.
Decide What the Empty Space Is For
Start with the area that is not the subject. “Leave space on the left” is better than saying nothing, but it remains weak because the model has no reason to preserve that space. Give it a function and a visual character.
For an editorial photograph, the left side might show an uninterrupted plaster wall reserved for a title. In a domestic scene, it could reveal the long run of a kitchen counter leading toward a person at the far right. A street image may need open pavement in front of a walking figure, so the person appears to be moving into the scene rather than leaving it.
This decision also settles which side carries visual weight. State that plainly. “Subject on the right” can still yield a face close to the middle; “the person occupies the rightmost third, with more than half the frame left open” is observable when the result arrives.
Set the Canvas Before Writing the Scene
Aspect ratio establishes the boundary within which the composition has to work. It does not, by itself, move a subject away from center. Choose the ratio in the Grok Imagine image controls first, then write the prompt for that shape.
A wide canvas gives lateral negative space room to exist. A vertical canvas often needs a different solution: the subject can sit low in the frame, lean against one edge, or be partially cropped while the upper area remains quiet. If a reference image is being used, Auto may preserve its existing proportions; an explicit ratio can instead define the intended delivery frame. Neither option guarantees subject placement.
Do not write a horizontal composition and later switch to a vertical ratio without revising the spatial directions. The crop may force the model to recentre the face simply to keep it visible.
Use Coordinates That a Reviewer Can See
Effective composition language describes position, scale, crop, and direction of attention. It does not need camera jargon for its own sake. A workable prompt passage might read:
Waist-up phone photograph of a ceramicist in a small studio. Place the ceramicist in the rightmost third. Keep the left half of the frame open, showing a plain workbench and unbroken wall. Crop a small part of the subject’s right elbow at the frame edge. Camera at chest height, two steps back. The subject looks left into the empty area, not at the camera. Do not center the face or body.
The positive instructions build the desired frame. The final negative sentence is only a guardrail; it cannot carry the entire composition. “Do not center” without a destination often produces a trivial offset that still reads as centered.
Scale matters too. A close headshot has little room to create a meaningful imbalance. If the vacant area is essential, specify that the person is small or medium within the frame and that the environment remains visible.
Make Phone-Camera Imperfection Deliberate
Natural-looking framing comes from a plausible moment, not a pile of vague texture words. Decide why the camera missed perfect alignment. Perhaps the photographer raised a phone while stepping through a doorway, or followed a subject who stopped near the edge. That physical setup can guide camera height, crop, and sightline.
Use one or two controlled irregularities. A clipped shoulder, slightly tilted vertical, foreground obstruction, or extra floor can make the frame feel observed rather than arranged. Asking for all of them at once usually muddies the composition. “Random,” “messy,” and “badly framed” also surrender too much control: they can affect focus, anatomy, or scene logic instead of moving the subject where needed.
Keep the lighting description secondary. Dramatic light often pulls attention toward the brightest face and encourages a formal portrait. If off-center placement is the priority, begin with simple illumination and add a stronger lighting idea after the geometry holds.
Stop References From Recentering the Result
Reference images can preserve a person, object, setting, or visual language, but they also bring their own composition. A centered headshot is strong evidence for identity and equally strong evidence for centered placement unless the prompt distinguishes those roles.
Tell the model what to borrow and what to disregard. For example: use the reference for the subject’s face, hair, and jacket; do not copy its head-and-shoulders crop or centered pose. When several references are uploaded, avoid treating all of them as equal layout authorities. Select one image for subject identity and one, if needed, for the spatial arrangement. Then inspect whether the result reconciled those jobs or merely averaged the frames.
If the approved still will later become a motion shot, settle the composition before moving it into the seedance 2.5 video route. Motion should develop a chosen frame, not become a workaround for a still whose subject began in the wrong place.
Review the Frame Before Its Style
At first pass, ignore whether the colors feel fashionable or the surface detail looks impressive. Place a simple thirds grid over each candidate and ask a few literal questions. Does the face cross the centre line? Is the promised empty area actually uninterrupted? Did an object appear there and consume the space? Is the subject large enough that the offset is barely perceptible?
Reject a candidate when it misses the spatial requirement, even if its finish is attractive. Otherwise, later prompt edits tend to preserve the appealing style while making only timid changes to the layout.
Change one spatial variable at a time. Move the subject farther toward the edge before adding a crop. Adjust camera distance before changing the setting. A series of single-variable revisions shows which instruction is doing useful work and keeps the prompt from turning into contradictory stage directions.
Browser-based iteration and code-driven generation should also have separate records. Teams automating image tasks may use reAPI, an independent multi-model API aggregator, while ClipDance remains its own browser product. Keep the selected ratio, prompt revision, reference order, and accepted output together regardless of which route produced a candidate.
Mark the Accepted Frame on a Thirds Grid
Approval should name the composition that survived review. Save the chosen image with a small note such as “face within right third; left 55 percent clear; elbow crop accepted; 16:9 delivery.” That note is more useful than calling the frame “candid,” because another editor can test the same conditions after a revision.
Open the final export once more at its intended display shape. If a site crop, mobile preview, or layout overlay pushes the face back toward the middle, revise the delivery crop rather than the generation prompt. When the subject remains off-center and the empty area still performs its assigned job, mark that exact file as the framing master.

Passionate about exploring diverse ideas and sharing inspiration, I curate content that sparks curiosity and encourages personal growth. Join me at ElementalNest.com for insights across a wide range of topics.